
Introduction
In my previous article/tutorial, I’ve explained how to setup your own DNS-over-HTTPS (DoH) server using Nginx, Certbot, dnscrypt-proxy and dns-over-https. In this article I’ll explain to you how to add Pi-Hole into the mix to block the unwanted advertising.
Pi-Hole
![]()
Pi-Hole is made of 2 components: a PHP web interface and a DNS server. Both are open-source. The web interface let you add blacklist, whitelist and configure the DNS server. The DNS server is the one doing the heavy lifting, responding to the queries according to its configuration generated by the interface.
The name comes from the lightness of the application, it can run without problem on a raspberry pi in your own network.
Install
Installing Pi-Hole couldn’t be easier, you need to download their installer and run it.
This installation has been tested on Ubuntu 20.04.
Check the screenshots before running the command, or simply, be sure to disable lighttpd.
sudo apt install dialog
curl -sSL https://install.pi-hole.net | bash
If you don’t want to use their installer, you try their docker image.
Configuration
This section will mostly contain screenshot showing you what to do to configure your Pi-Hole for it to works with the currently installed dnscrypt-proxy.
Steps
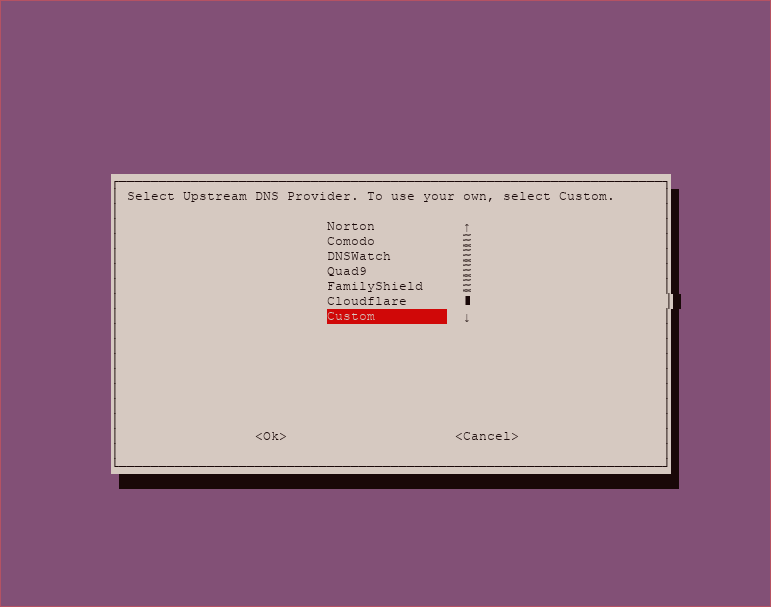
First select the Custom server, we’ll set directly the IP of our dnscrypt-proxy.
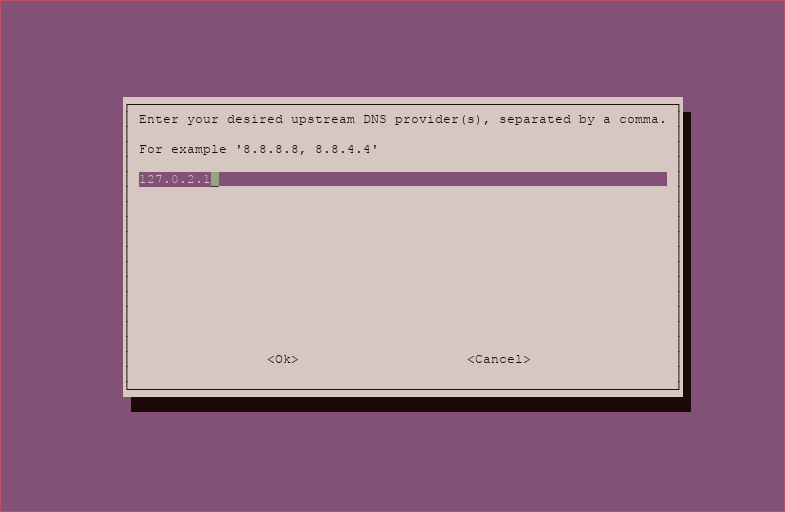
Input the IP of the dnscrypt-proxy socket: 127.0.2.1
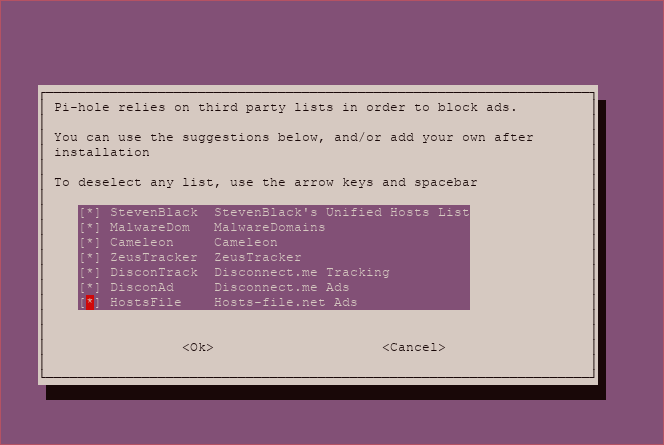
 Choose which blacklist you want. You’ll be able to add your own in the UI later.
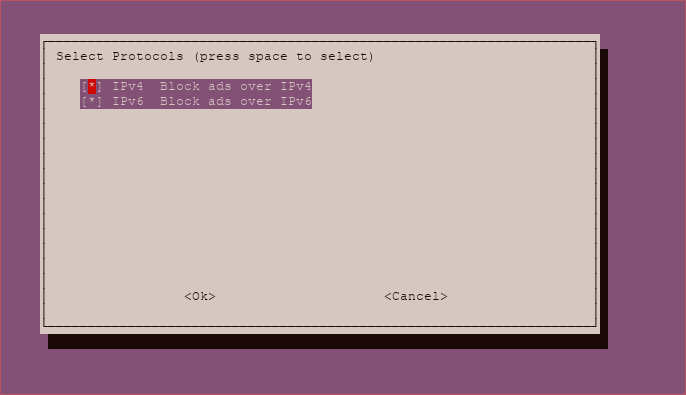
 You can keep this as default. If your machine doesn’t have IPv6, Pi-Hole will detect it.
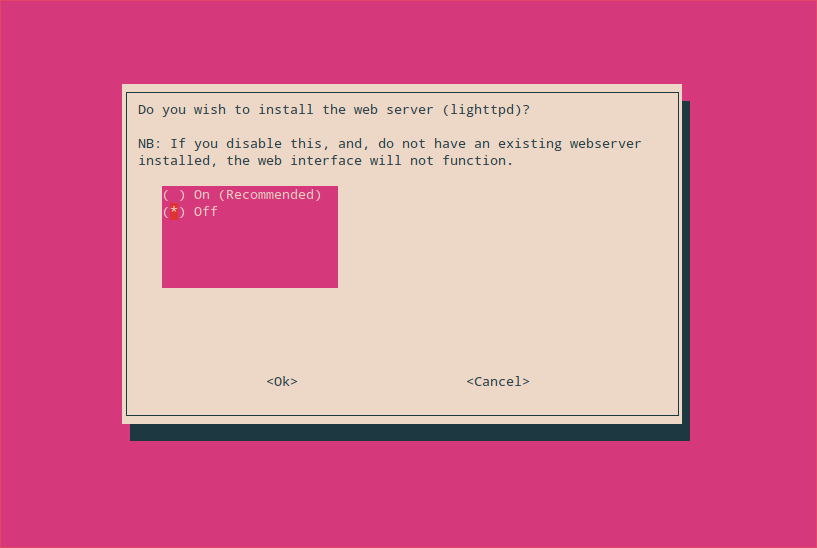
To make things easier, I advise you install the Web Admin interface.
We don’t want Lighttpd, since we already have Nginx. We’ll configure Nginx to serve the admin website.
Continue the installation until the last screen where it shows you the full config and admin password.
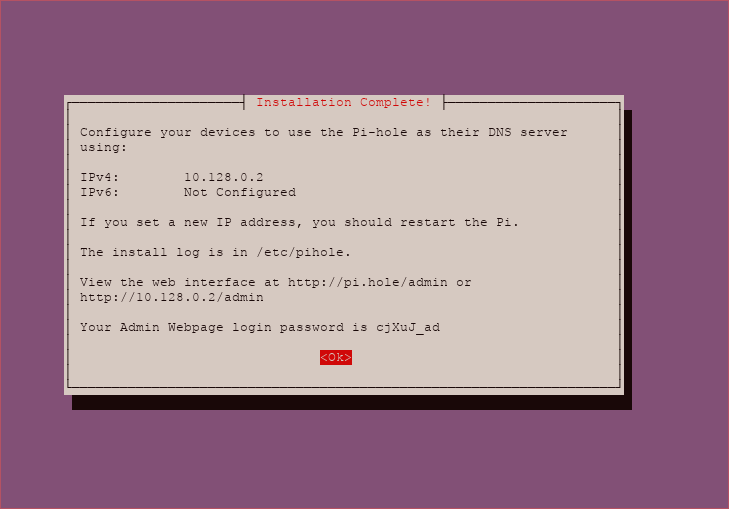 If you’re using Google Cloud Platform like me, the IP it shows is not the public one. You’ll need to go in your console in instance to get the public IP.
![]() Before connecting to the UI, we’ll run a configuration command to set the password to what we want.
Before connecting to the UI, we’ll run a configuration command to set the password to what we want.
sudo pihole -a -p
This will ask you to set a new password.
Groups
We need to add the group pihole to the www-data since it will be needed by the interface to work with the database.
Also need to change the default www.conf php-fpm pool file to reflect the need of the new group.
Lastly, restart php-fpm to take the change into account.
sudo usermod -a -G pihole www-data
sudo sed -i 's/group = www-data/group = pihole/g' /etc/php/7.4/fpm/pool.d/www.conf
sudo systemctl restart php7.4-fpm
Nginx
Since we don’t want to use lighttpd as webserver, we’ll have to configure Nginx.
Install
First we need to install PHP-fpm to take care of running the PHP website.
sudo apt install php7.4-fpm php7.4-zip php7.4-sqlite3
Configuration
Put the content of this file into /etc/nginx/sites-available/pihole.
Don’t forget to change the server_name for your domain name.
server {
        listen 80;
        listen [::]:80;

        root /var/www/html;
        server_name blocker.example.com;
        autoindex off;

        index pihole/index.php index.php index.html index.htm;

        location / {
                expires max;
                try_files $uri $uri/ =404;
        }

        location ~ \.php$ {
                include snippets/fastcgi-php.conf;
                fastcgi_pass unix:/run/php/php7.4-fpm.sock;
        }

        location /*.js {
                index pihole/index.js;
        }

        location /admin {
                root /var/www/html;
                index index.php index.html index.htm;
        }

        location ~ /\.ht {
                deny all;
        }
}
Then do a symlink to the enabled folder. Ask nginx to check that to configuration works, and reload nginx.
sudo ln -s /etc/nginx/sites-available/pihole /etc/nginx/sites-enabled/pihole
sudo nginx -t
sudo systemctl reload nginx
Adjustment Pi-Hole
Check the configuration file /etc/pihole/setupVars.conf
Be sure that IPV4_ADDRESS point to the public IP (WAN) of your machine, not the LAN one.
To easily get the public IP of your machine, do on that machine:
curl ifconfig.me
Then edit the setupVars.conf file.
WEBPASSWORD=e2982d4991ab003425cd1b556d84c052f1a6cd170028d265082bca9cce52cef9
PIHOLE_INTERFACE=lo
IPV4_ADDRESS=MY_PUBLIC_IP_GOES_HERE/32
IPV6_ADDRESS=
PIHOLE_DNS_1=127.0.2.1
PIHOLE_DNS_2=
QUERY_LOGGING=true
INSTALL_WEB_SERVER=false
INSTALL_WEB_INTERFACE=true
LIGHTTPD_ENABLED=false
This is done because the interface check if you’re accessing it from an accepted source.
sudo systemctl restart pihole-FTL
Certbot
As before, let’s make this domain an HTTPS one.
sudo certbot --nginx -d blocker.example.com
And Voila, the full UI is HTTPS and accessible with Nginx.
UI
There are 2 UI, a public one containing all the stats of the server and the Admin one letting you administrate your Pi-Hole.
Accessible at https://blocker.example.com/admin. (Of course, the domain name need to be replaced by the one you are using).
Public
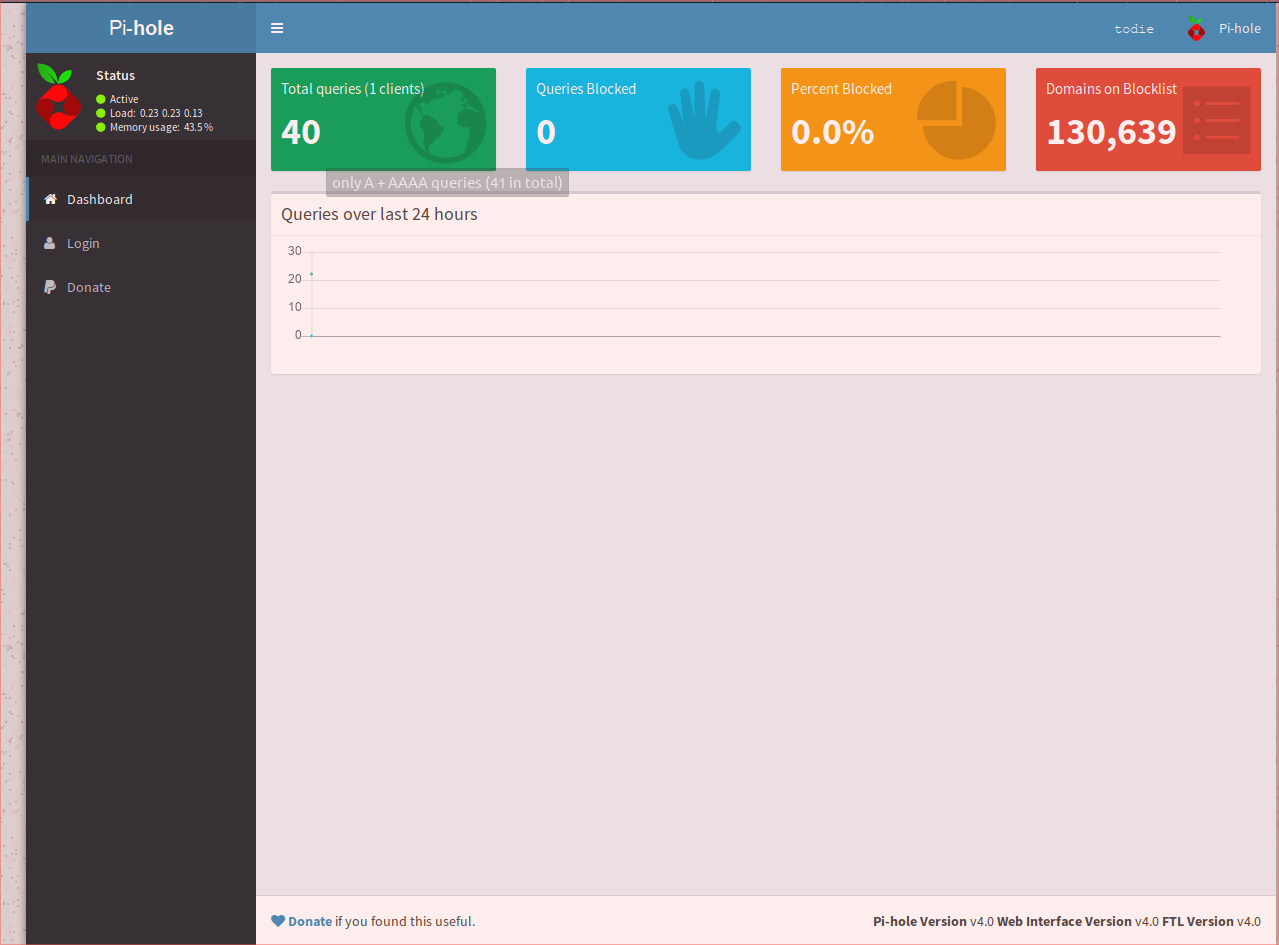
This is the basic UI. Right now everybody can see this but only the Admin can add new blacklist/whitelist and configure the whole solution.
Admin
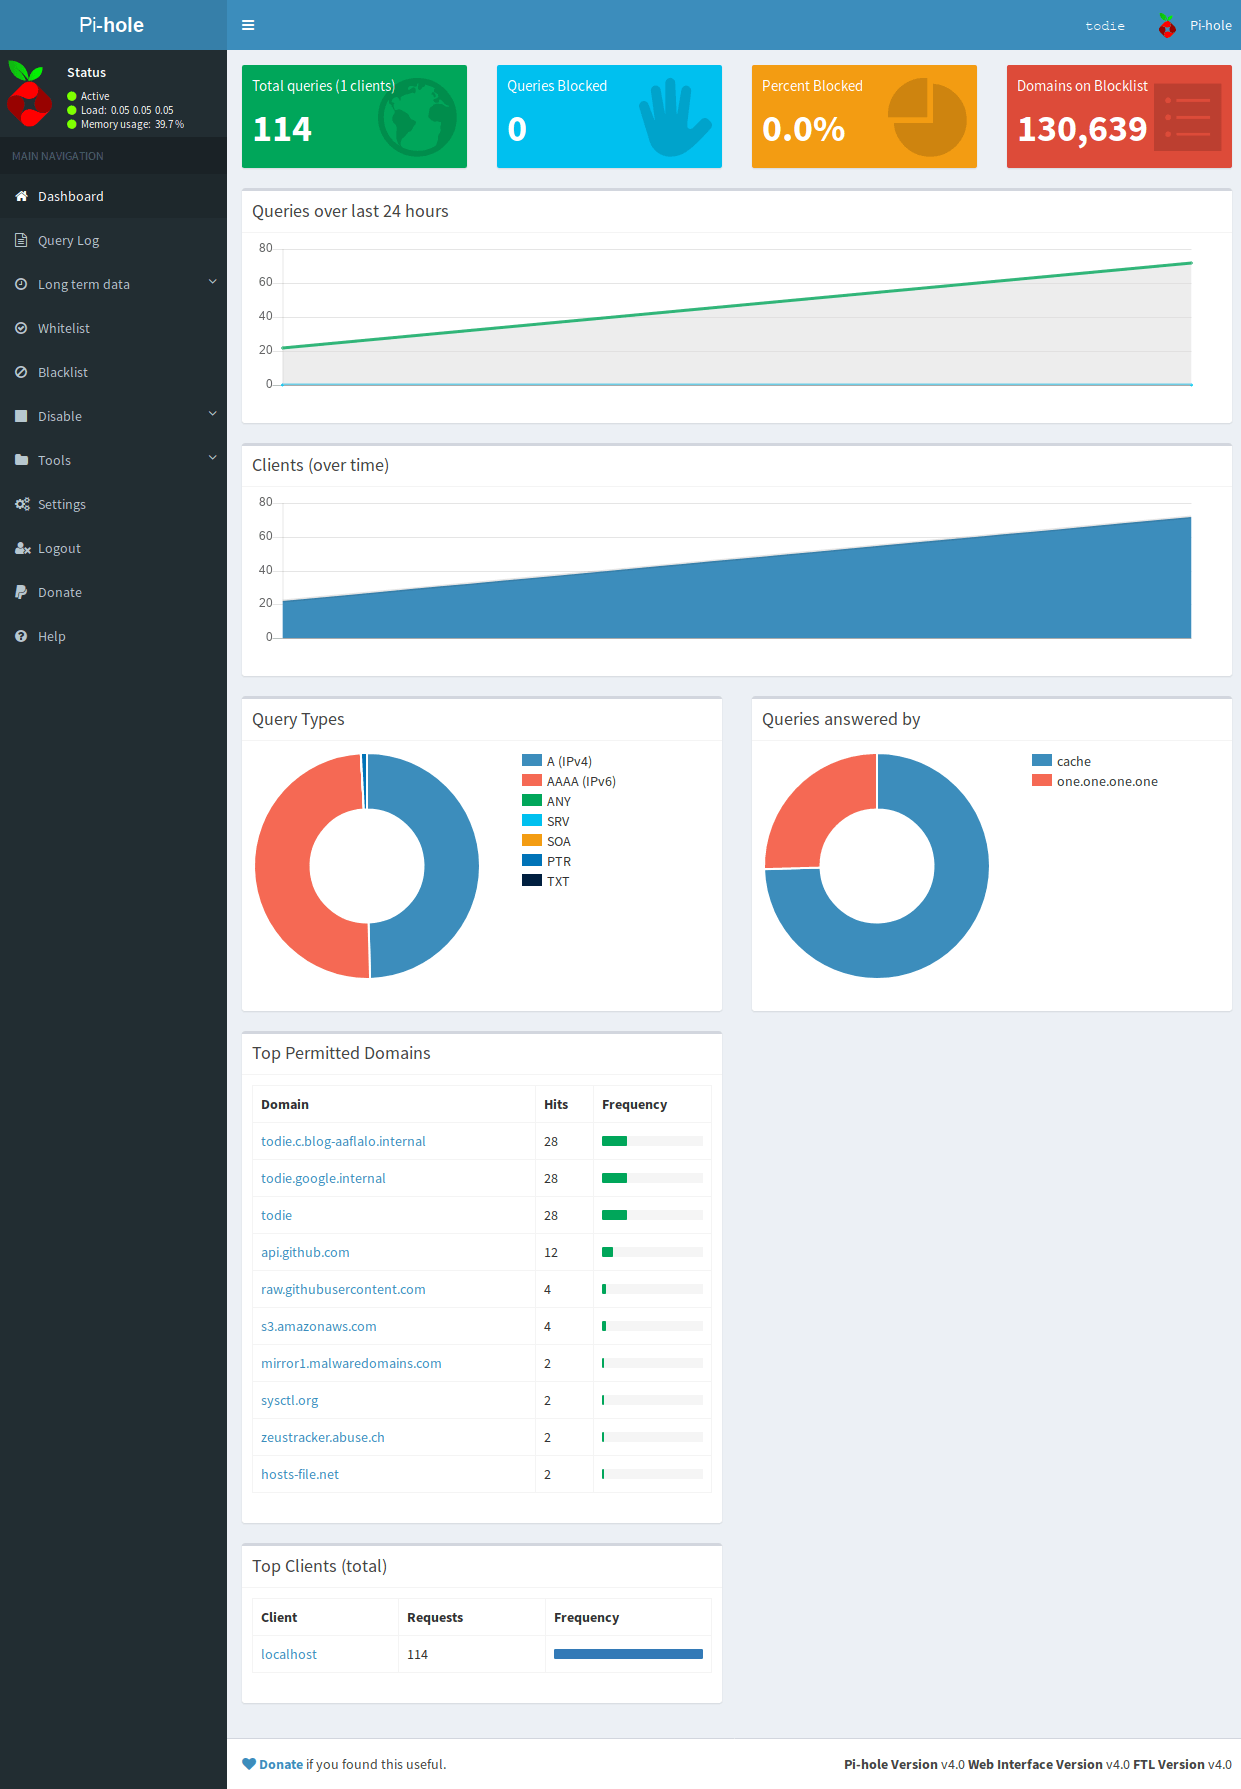
Once you click on Login, you’ll see something different.
You have more detailed statistics about the different requests done on your DNS Server.
As you can see, I’ve just spawn the instance on GCP and I’m already getting scanned for DNS Server. There is a section about firewalling later in this guide. Basically we’re going to block the public port 53, since we don’t need everybody to do request to our Pi-Hole, only doh-server.
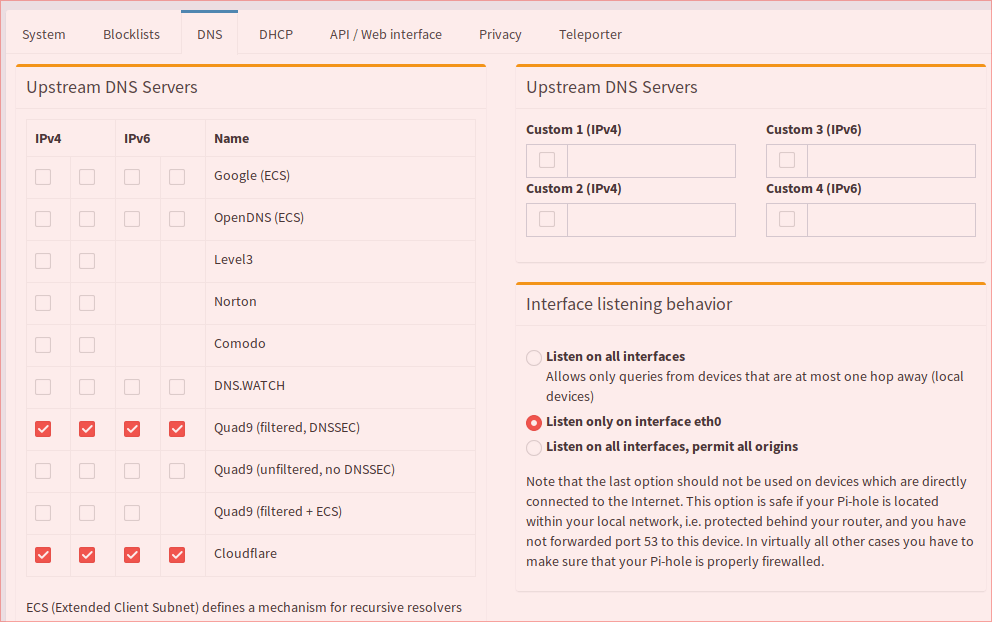
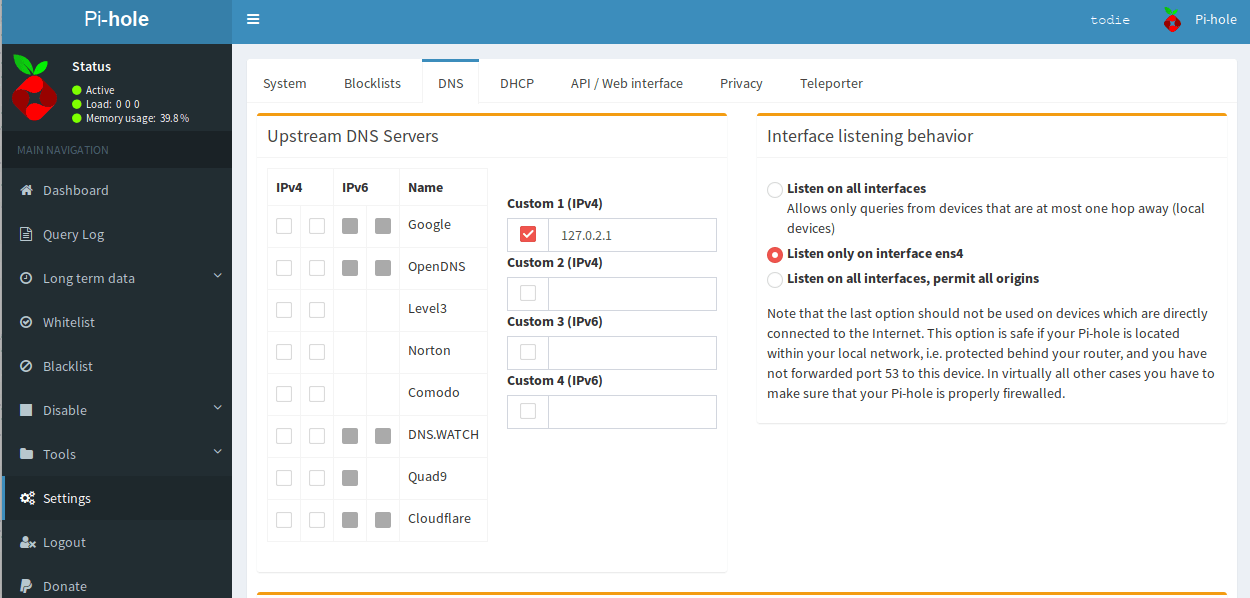 Double check the settings to see if the installer did select the right DNS server.
This what it supposed to look like. If it’s not the case, you can correct it.
Test
You can easily test your Pi-Hole server using dig.
dig test.com @127.0.0.1
; <<>> DiG 9.11.3-1ubuntu1.1-Ubuntu <<>> test.com @127.0.0.1
;; global options: +cmd
;; Got answer:
;; ->>HEADER<<- opcode: QUERY, status: NOERROR, id: 18636
;; flags: qr aa rd ra; QUERY: 1, ANSWER: 1, AUTHORITY: 0, ADDITIONAL: 1
;; OPT PSEUDOSECTION:
; EDNS: version: 0, flags:; udp: 4096
;; QUESTION SECTION:
;test.com.                      IN      A
;; ANSWER SECTION:
test.com.               2       IN      A       0.0.0.0
;; Query time: 0 msec
;; SERVER: 127.0.0.1#53(127.0.0.1)
;; WHEN: Wed Oct 03 17:32:34 UTC 2018
;; MSG SIZE  rcvd: 53
This well check for the domain test.com which is in one of the default blacklist.
As you can see the answer for it is 0.0.0.0 which is the default answer for blocked domains.
Blocked Answer Type
By default, Pi-Hole will return 0.0.0.0 for blocked domains. You can change this behaviour as documented on the official website.
Personally I prefer to return NXDOMAIN for blocked domains, making the DNS clients think the domain doesn’t exists.
If you want NXDOMAIN, do this command.
echo "BLOCKINGMODE=NXDOMAIN" | sudo tee /etc/pihole/pihole-FTL.conf
sudo systemctl restart pihole-FTL
DoH-Server
Now that you have your Pi-Hole working, we need to reconfigure DoH-Server to use Pi-Hole as a source of DNS instead of dnscrypt-proxy.
# HTTP listen port
listen = [
    "127.0.0.1:8053",
    "[::1]:8053",
]

# TLS certification file
# If left empty, plain-text HTTP will be used.
# You are recommended to leave empty and to use a server load balancer (e.g.
# Caddy, Nginx) and set up TLS there, because this program does not do OCSP
# Stapling, which is necessary for client bootstrapping in a network
# environment with completely no traditional DNS service.
cert = ""

# TLS private key file
key = ""

# HTTP path for resolve application
path = "/dns-query"

# Upstream DNS resolver
# If multiple servers are specified, a random one will be chosen each time.
upstream = [
    "127.0.0.1:53",
]

# Upstream timeout
timeout = 60

# Number of tries if upstream DNS fails
tries = 10

# Only use TCP for DNS query
tcp_only = false

# Enable logging
verbose = false
Change the upstream servers to 127.0.0.1:53.
Then restart the service.
sudo systemctl restart doh-server
There you go you now have a DoH server with Pi-Hole.
Firewalling
This is great, you have a fully working DoH server. But Pi-Hole like to listen on all interfaces. This is normal since it’s made to be installed on a Raspberry Pi in your own network with only a LAN interface.
But with a server on internet, that can be more than problematic. Your server could be used to DNS Flood other servers. We don’t want that.
UFW
We’re going to configure UFW to take care of the firewalling.
HTTP(s)
First we want all the HTTP and HTTPS traffic to be open on our machine. HTTP is used for by Certbot when validating that the domain belongs to you.
sudo ufw allow http
sudo ufw allow https
SSH
Obviously we want to be able to administrate the server.
sudo ufw allow ssh
Default
And now everything else should be blocked on Inbound.
sudo ufw default deny incoming
Final Touches
Enabling the firewall
sudo ufw enable
Checking that the rules are set correctly
sudo ufw status verbose

Status: active
Logging: on (low)
Default: deny (incoming), allow (outgoing), disabled (routed)
New profiles: skip
To                         Action      From
--                         ------      ----
80/tcp                     ALLOW IN    Anywhere
443/tcp                    ALLOW IN    Anywhere
22/tcp                     ALLOW IN    Anywhere
80/tcp (v6)                ALLOW IN    Anywhere (v6)
443/tcp (v6)               ALLOW IN    Anywhere (v6)
22/tcp (v6)                ALLOW IN    Anywhere (v6)
Now your server is firewalled correctly. Only HTTP, HTTPS and SSH traffic is accepted.
Conclusion
You have now a DoH server that blocks advertisings. You can use the admin interface of the Pi-Hole to change the whitelist and the blacklists. There are a lot of tutorial online on how to add new blacklist, etc …
28th January 2019 at 05:57
Thanks, excellent guide!
I tried to use the same domain for both the dns and the pihole, did not work well.
Do you have any suggestion for windows client?
Currently using infra on android, works well
28th January 2019 at 16:32
Hello,
Thank you !
Well if you do use the same domain, you’ll have to setup nginx correctly to redirect trafic to /dns-query to the doh-server and the rest to the pihole. Personally, I use 2 domains, it’s easier.
The only client I know is DNSCrypt, it takes sometime to set it up, but there are official tutorials in the wiki.
24th February 2019 at 07:09
Hello, I am having problems now, can you help me?
I installed pi hole on vps. Now install DNS-OVER-HTTPS and open the problem https://XXX.XXXX.com/admin prompt 403 Forbidden
How can I get it to open normally?
—
Edited to remove server URL
25th February 2019 at 16:38
Did you edit the /etc/pihole/setupVars.conf file and put the public IP of your machine ?
I’ve made a couple of change to be sure that part is clearer.
I’ve redone my tutorial without any issue using the same informations.
19th December 2019 at 19:08
I’m also having same 403 error
I have updated /etc/pihole/setupVars.conf file and put the public IP of my machine
seems like nginx doesn’t know where to load the files from?
9th January 2020 at 23:50
This happens if you run certbot before updating your host in sites-enabled/pihole nginx config file
15th January 2021 at 00:44
noob here… so I am stuck, how do you fix this?
6th March 2019 at 06:16
hi antoine, i follow both of your tutorial
and i encounter a problem to start pihole because dnscrypt already use the port 53, i installed dnscrypt and pi hole in the same server
dnscrypt 127.0.2.1:53
doh-server localhost:8053
pihole FTL *:53
6th March 2019 at 16:43
Hello syahrilz,
You have to configure pihole FTL to only listen to one interface like eth0 or lo instead of all interfaces.
You can set that in the admin panel.
6th March 2019 at 16:57
If you’re not able to do it in the admin panel you can edit the file:
/etc/dnsmasq.d/01-pihole.conf
And set
interface=eth0
Then in another file like /etc/dnsmasq.d/02-interface-bind.conf put
bind-interfaces
Then restart pihole
14th June 2021 at 15:19
Other solution is to change the dnscrypt-proxy port.
Edit 2 files: (I am writing from memory, can not access my server for a few days, check file names /spell yourself)
/etc/dnscrypt-proxy/dnscrypt-proxy.toml
Change port 53 to any other like 5350 on this line:
Listen_addresses=[127.0.0.1:5350]
and second file -socket:
systemxtl edit –full dnscrypt-proxy.socket
Change port in two lines:
Listenstream=127.0.0.1:5350
Listendatagram=127.0.0.1:5350
Restart dnscrypt-proxy.
Change in pinhole dns resolver to second part of the tutorial):
127.0.0.1#5350
Yes, port after this sign #, not “:”
6th March 2019 at 22:28
I setup new ubuntu server exactly according to your guide
But on Android 9 private dns server I am getting could’nt connect error
6th March 2019 at 22:32
Hello Albert,
This is because Android 9 (Pie) uses DNS-over-TLS (DoT) not DNS-over-HTTPS(DoH). This is not the same protocol and setup.
In fact, I’m planning to make a small guide how to configure DoT.
6th March 2019 at 22:48
That would be great,
Thanks for your good work.
6th March 2019 at 23:34
I’ve finished the guide to add DoT to the DoH setup.
https://www.aaflalo.me/2019/03/dns-over-tls/
7th March 2019 at 01:09
Hi Antoine,
I used the new DOT guide but my Android private DNS still giving could’nt connect error
7th March 2019 at 02:41
Can you try your DoT server with this tool ?
https://getdnsapi.net/query/
You put the IP of your server (public IP), the name of the TLS certificate (the domain name).
Then you do a request on google.com
I tried with my server where I have the same setup and it works for me.
If it doesn’t can you comment on the other tutorial instead ? In case other people have the same issue as you and we correct it.
3rd July 2019 at 22:00
What way is there to log the real client names/ips in pi hole? All requests come from localhost.localdomain (because of nginx, i know).
Can the nginx http_realip_module be used for this? Or is it possible to pass the client name/ip with the default modules and i have a wrong configuration?
19th July 2019 at 15:18
It should be possible, but wouldn’t be that easy as DoH server is the one doing the DNS request.
You would need to parse the NGINX log.
12th September 2019 at 13:28
Hello, I installed this tutorial “DNS-over-HTTPS with pihole” after installation to open the pihole background prompt “The FTL service is offline!”, how to solve?
12th September 2019 at 14:54
Did you try: /etc/init.d/pihole-FTL start ?
16th September 2019 at 15:07
yes ,The FTL service is offline
10th March 2020 at 17:57
Hi there,
Thank you for all these tutorial 🙂
AMAZING.
Maybe add in this one tho install also php7.2-sqlite3 ?
Was causing for me problem in networktab (web interface) and long term data/query log
Regards
12th May 2020 at 01:45
Guide updated to work with Ubuntu 20.04 and Pi-hole v5.0.0
18th May 2020 at 02:09
Weird; on Ubuntu 20.04 during Pi-hole install I am seeing:
”
[✗] pihole-FTL: no process found
[✓] Cleaning up stray matter
[✓] Restarting DNS server
[✗] DNS service is NOT running
“
23rd August 2020 at 19:37
I am also getting this error
24th August 2020 at 08:30
I switched to a Ubuntu 18.04 LTS VM and it’s working fine there.
22nd July 2021 at 15:23
If upstream DNS resolver dnscrypt-proxy use DNSSEC server, do still need enable DNSSec in Pihole?
I THINKING that in this situation there is double validation.
13th September 2021 at 17:17
I am trying on Ubuntu 20.04 LTS and I get the following error:
“`
[✗] DNS service is not running
[✓] Restarting DNS server
[i] Time until retry: 91
“`
Antoine, any advice on this?
13th September 2021 at 17:59
I managed to fix this issue by setting the following in /etc/resolv.conf:
nameserver 127.0.2.1
10th February 2022 at 09:48
Hello,
I want to create a tunnel with Wireguard to redirect my all trafic via server but i couldn’t solve IP ranges issue. How can i solve it?
30th March 2022 at 12:33
Antoine, is there an easy way to extend the filtering capacity to block adult sites and make the experience family safe?
30th March 2022 at 18:07
Hey Santosh,
Yes, you would need to find blocklist specialized in blocking adult site like:
https://raw.githubusercontent.com/chadmayfield/my-pihole-blocklists/master/lists/pi_blocklist_porn_top1m.list
22nd May 2023 at 14:55
Hello
Thanks for creating this guide, but could you give me an example config for apache2, since I’m already using apache2 as a reverse proxy and webserver for the pihole admin page I don’t want to switch to nginx.
That would be helpfull.
Pascal Kuppler